Invoicing - How to do I add manual charges?
Adding charges to your invoicing process is a breeze with our straightforward system. Here's a simple guide to help you through the process:
1. Access the Invoicing Tab
Begin by navigating to the "Invoicing" tab within the admin view. This is where you'll manage all your invoicing activities.
2. Select Invoicing Month
Choose the invoicing month you wish to modify. Typically, this would be the most recent month.
3. Find the Company
Use the search bar to locate the company you're working with. This ensures precision in your invoicing tasks. Once you've located the company, select it to proceed with adding charges.
4. Add Manual Charges
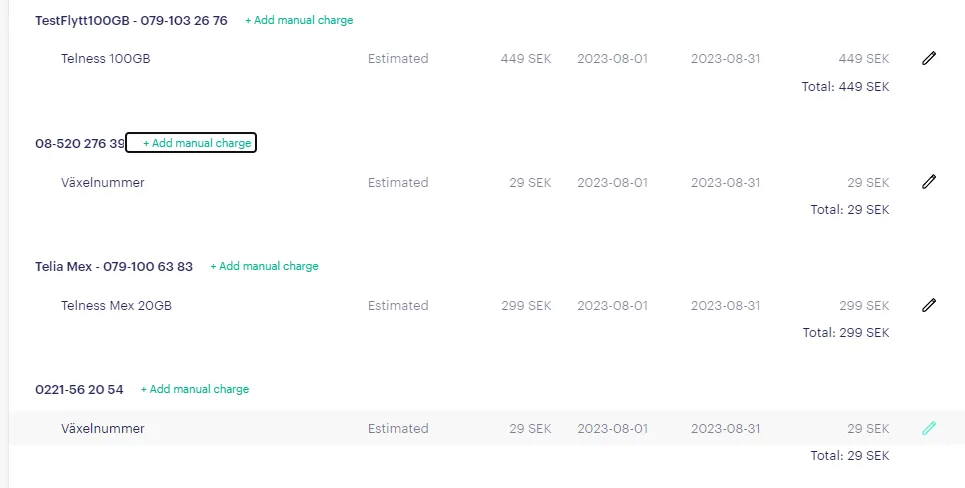
Click on the "Add Manual Charge" button associated with the customer's subscription. This action will open a new window where you can define the parameters of the charge.
Manual - One Time Charge
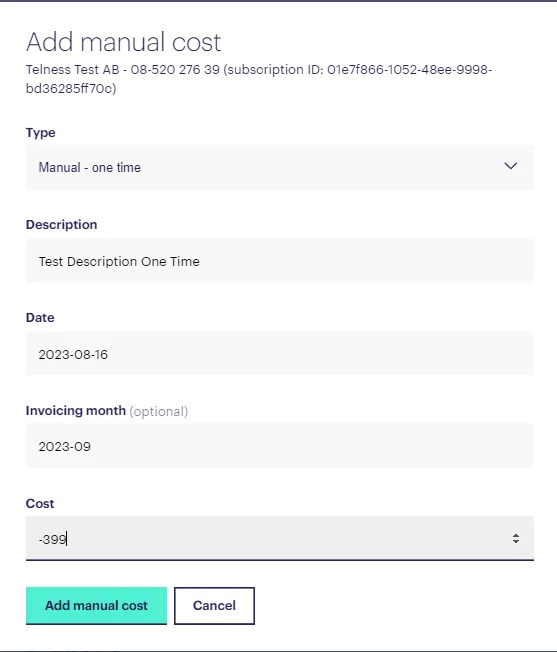
If you're adding a one-time charge, choose this option. Provide a description and specify the date when the charge was made. Optionally, select the invoicing month (defaults to the current month). Costs can be positive (for additional charges) or negative (for discounts or rebates, in -XXX format).
Manual - Recurring Charge
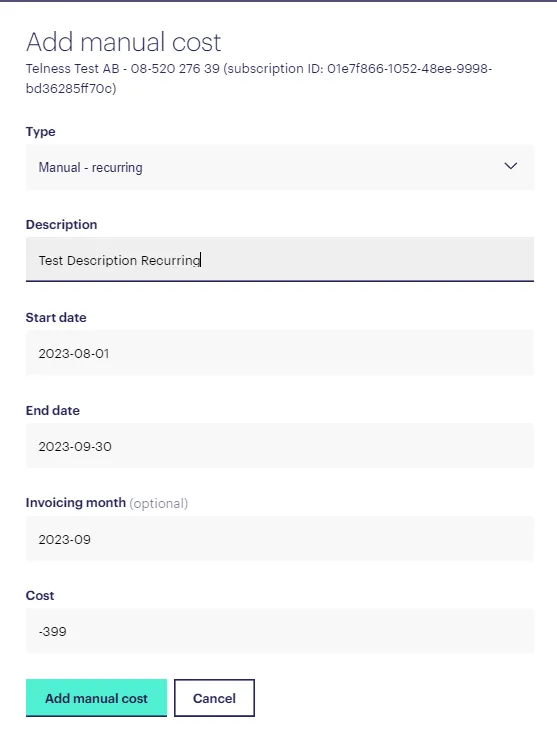
For charges that recur monthly, opt for this choice. Set the start and end dates, preferably aligning with a full month cycle. Describe the charge and specify the date it was made. Just like before, you can select the invoicing month (defaults to the current month) and input positive or negative costs in the XXX or -XXX format.
5. Verify that the charge is showing correctly
After setting up the charges, ensure their accuracy by checking the invoice. Verification is essential to maintain a clear invoicing process.
By following these steps, you'll have seamlessly added charges to your invoicing system, ensuring accurate financial records.